For most around the country, the summer is winding down, and it’s that timThe Smart Boaters Guide to Winterizing again: winterization time. The time and effort you put into it will mean that when the weather turns good again you can get back to it sooner, instead of having to c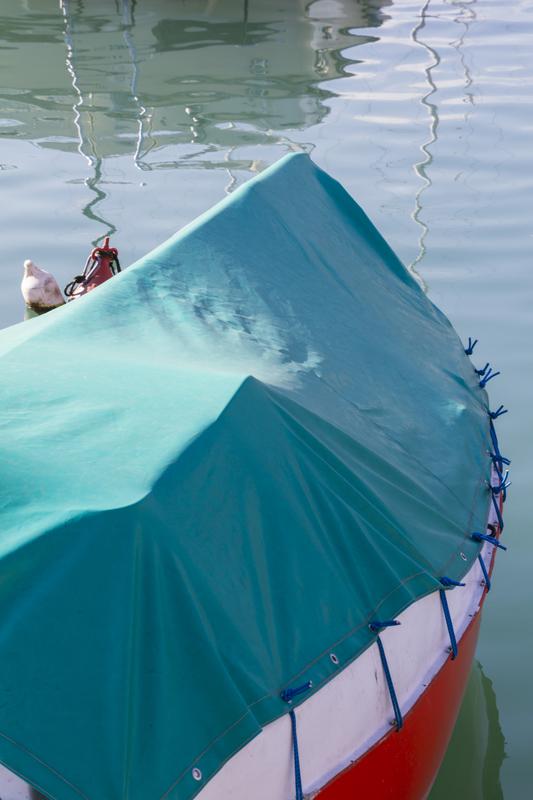 orrect or repair things that you just let go. It is definitely part of the old saying, ‘pay me now, or pay me later’. It’s often been the lament of boat owners to believe that their insurance will cover damage like this, but most policies don’t cover your lack of maintenance on the vessel, or your neglect (read…they don’t insure against stupidity).
Make a To-Do List NOW for your Boat Winterizing
Winterizing Your Boat’s Engine
One of the more crucial winterizing tasks is to make sure your engine is all tucked in for the long winter’s nap (and that you can wake it up again in the Spring). First, run the engine to bring it up to temperature, then shut it off. Change the oil while it is still warm because this flushes the impurities and when you drain the oil, they’ll all come out with it. Take the time to change the filters (oil filters), then flush the engine with water (distilled is best, but you can use a hose). West Marine also makes an actual winterization kit, which has the right type of hose, a five-gallon jug, and instructions for use. You will also need some antifreeze, the type that is non-toxic and specially made for marine environments. If you’re at West Marine anyway, their Pure Oceans line of antifreeze or the Star Brite Professional Grade antifreeze is excellent.
Once you’ve circulated the antifreeze through the manifold (using the winterization kit, or a hose from your water pump to your jug of antifreeze), then it is time to start the engine back up to allow that antifreeze to make it fully into the engine. When water starts to come out of the exhaust, the process is done. How long this will take will depend on the type of engine you have.
This is a good time to change the fluid in your transmission as well, as well as the spark plugs, then wipe everything down really well, and hit it all with a nice mist of WD-40 or something similar. For good measure, you can spray some of that down into the spark plug cylinders before replacing.
Winterizing Your Stern Drive
If your boat has a stern drive, then you should check it over thoroughly and remove any biologicals from it (barnacles, algae, etc..). Check for moisture in the oil when you drain the gear case, as this could tell you that you have some seals that aren’t working right. These will need to be replaced, if so. Check the rubber boot (if you have one) for any sort of dry rot, weathering, cracks, and so forth. There is a sealant that you can smear on this if you do see issues, but honestly, it is just simpler, and better to go ahead and replace it now. Lastly, grease everything up really nice, check fluid levels and refer to your owner’s manual for other light winterization tasks.
Winterizing Your Outboard
I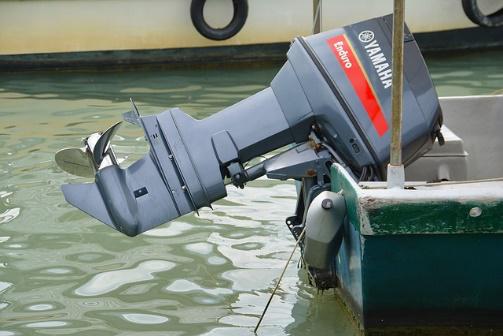 f you have an outboard, which most do, then you need to flush that engine with water using a ‘flush muff’ or the winterization kit from West Marine. Once all of the water is drained out of the engine from the flushing, wash it with
soap and water, then make sure to get all of the soap residues out of there. This is extremely important. At this point, you’ll want to take off the fuel hoses, and run the engine one more time until it stops. The reason you do all of these steps is to ensure that all of the fuel is completely drained from the carburetor, because if it isn’t, then there will be deposits that will build up in there as the fuel evaporates. Once this happens, you’ve got trouble come Spring time.
You can use fogging oil, or WD-40 on the cylinders, and on the pistons. It’s a really good idea to use some grease that is specially made to be waterproof on the propeller shaft, and especially on the threads. Gear oil needs to also be changed, then lubricate the outside of the engine or give it a good wax to weatherproof it.
Check out this great deal on WD-40. It is now half price only $4.99. Click here to see this great deal!
Winterize Your Boat’s Fuel Tank
The fuel tank could develop some condensation over the winter, depending on how long your winter lasts. Adding a fuel stabilizer to the tank can cut down on this. While you’re in there, change the filters, and the water separators.
Winterize Your Boat’s Bilge
You will need to get that bilge as dry as
you can because any water left in there is going to either condense, grow funk (and yes that’s the technical term), or worse yet, freeze and crack something vital. It’s disgusting, but you need to get down in there and clean it with hot water, a long-handled brush, and some environmental soap. Then, once you’ve gotten them all clean, spray a little lubricant that displaces moisture, and throw a small amount of antifreeze down in there to take care of any water that you might have missed. No, you can’t skip this step. No, you can’t just skip the clean out and throw antifreeze down in there. You will regret it later. Just do the job.
Winterize Your Boat’s Fresh Water System
If your boat has a fresh water system, you’ll need to drain both the cold and hot water tanks. Just disconnect the lines, then hook them back up together. Next, you can send a non-toxic antifreeze into the system, turn on all of the spigots (the shower, too), and wait until you start to see the antifreeze coming out. Once this happens, you’re good to go. As the last act, throw some antifreeze into the water heater.
Winterize Your Boat’s Head (bathroom)
First, get all of the ‘mess’ out of there at an approved pumping facility. While you’re there doing that task (second only to cleaning out the bilge), you’ll need to begin putting water into the toilet bowl and flush it several times. This is a good time to throw in some sort of cleaning product, such as the Pure Oceans Bowl & Drain cleaner, and let it just sit there and do its job for a bit. Then flush one more time and pump it all out. Add antifreeze and get it into the hoses, the y-valve, the macerator, discharge hoses, and the holding tanks. Your owner’s manual will let you know if the antifreeze you are planning to use is okay to use, or if you should use something that doesn’t have an alcohol base to it. This is because some bathroom fixtures and lines are made from composite materials that don’t hold up well to harsher cleaners. And, in the long run, alcohol based cleaners aren’t necessarily great for the environment either. When winterizing your boat, you definitely will want to choose your cleaning products carefully.
Winterize Your Boat’s Interior
Most things yo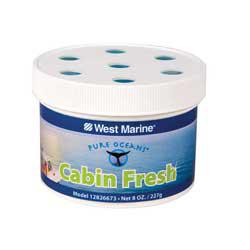 u can leave inside of your boat, no harm, no foul. The things that you’ll want to take out though would be items such as fire extinguishers, flares, the fenders, and the cushions, and any valuables. Electronics such as radios, televisions, and laptops should also be removed. You could leave the cushions and window coverings on board, but the winter gives you a good time to look them over and do some cleaning while the weather outside is less than ideal. Pull the marine batteries and bring them in (hooking them up to a battery tender is always a plus, too).
All interior drawers, cabinets, closets should be opened, and left open. It’s all about letting the air circulate. If you have a refrigerator/freezer then you’ll need to open them up, shut down the power source to it, and remove everything from it. Wipe it down. Depending on where you are, you might want to put in a dehumidifier, or you can use several canister type products that will continue to freshen the air and suck the moisture out of the air over the winter. Some of the more popular of those are the Forespar Tea Tree Deodorizer or the Pure Oceans Cabin Fresh. If you go with the canisters, you’ll want to purchase a few because despite what they say on the can, they don’t last the two to three months in all climates. It’s just a good rule of thumb to always have a few extra on hand.
Check out the best humidifier sale right here. Its only $169.98. Click here to get this deal.
Winterize Your Boat’s Hull
If your boat’s hull is made out of fiberglass, then it still will need a little TLC to withstand the winter. Most don’t think that fiberglass needs that much attention, and on one hand, they’d be right. But, ice can still wreak havoc on hatches, window tracks, or cause leaks elsewhere. Stress cracks can be made worse by the inclement weather, so take the time now to really look at the hull of your boat. Some of the more common areas to find stressing damage is around the bow eye. Look for gel coat blisters, too.
For small issues, like blisters in the gel coat, just stick a pin in them (thumbtacks are great for this). Drain them, let them dry, then patch them with an epoxy filler. If your hull is not fiberglass but is made of aluminum, then all you will need to do is use a rubber mallet, or the like, to knock out dents that were put in there (or leave them for character…they aren’t hurting anything, and make for some great stories). Either way, you’ll need to take care of any exterior issues.
Barnacles are another story and they need to go. Scrape them off, and sand off anything that remains. Pressure washing is excellent for taking care of the hull and getting it really clean for storage. To make this job easier next season, once it is dry, throw on some 3M Marine Performance Paste Wax. This adds another layer of protection to the existing coats.
Of course, inspecting your hull is made significantly more difficult if you can’t get it out of the water onto a trailer, or hauled out for dry dock in order for you to do the winterizing. Check with your marina or ask around to see what other larger boat owners do for winterizing.
To Store Your Boat in the Water, or Out of the Water…That is the Question
The best way to store the boat is out of the water, undercover. But before you do that, you’ll definitely want to pressure wash the exterior, fully winterize the interior, drain the seacocks, and prep it to be stored. Once it is stored, especially if it is at a facility in dry-dock, it will be expensive to pull it back out to complete your winterizing process. Many facilities offer to do this for you, but you’ll pay for it. If you are storing the boat at your home and don’t have a covered housing for it, then make sure you have the best tarp or wrap possible for it. Make sure it covers it ALL, not just the top, which is what most do, and most regret. Make sure the tarp is sturdy, not a bargain store quick buy.
Storing Your Boat in the Water for the Winter
Some boats are just too large to store anywhere else, or in some instances, it is more trouble than it is worth, to move it. In this case, you’re still going to winterize just as if you were going to store it out of the water, but you won’t pull the batteries out, and you won’t be throwing antifreeze through it. If the area where you berth tends to freeze, make sure you have some sort of device that keeps the water from freezing near your boat. This is accomplished with a de-icing product or a bubbling system. West Marine has several that are popular and are made for different types a
nd lengths of boats, including the popular Kasco line of products.
S ettle Your Boat in For a Long Winter’s Nap
Taking the time to fully winterize your boat can take a few weeks for people with normal (read busy) lives. So make sure to leave yourself enough time to get it done. A good rule of thumb is to start doing it just before the leaves begin to change in the Fall, if not the same week the kids go back to school. This gives you ample time before the first freezes settle in. Of course, you know the area you are in and can plan accordingly. Having to winterize in harsh weather conditions is not any fun, and you’ll be more apt to skip steps or think that certain tasks can be left undone. This can translate into a lot more time and money wasted in the Spring. And while we’re sure we’ve given you a lot of really handy tips, here, you’ll still need to check and refer back to your owner’s manual to make sure that there aren’t some brand specific maintenance and winterizing tasks that are specific to your craft and brand. And, last but not least…do not be afraid to ask for help. The only wrong move is not asking for some advice when you are new to all of this. If this article has shown you nothing else, it’s shown you that winterizing your vessel takes some time and effort (and a little cash). So, if you’re not sure how to flush a system, or winterize your bilge (or if you want to pretend you don’t know how so you can get some help), ask. Most boat people are happy to assist, because down the road, they will have a bilge with your name on it, too. Here’s a handy checklist that you can print out and use as a guide to winterizing your boat.
Weber Marine’s Winterizing Checklist
If you are located in New Jersey
Click Here to See this winter Rates.
Engines:
- Top up battery levels, put them on a charger (or pull and store indoors)
- Fill fuel tanks, or add stabilizer
- Change filters
- Change oil
- Check coolant levels
- Run antifreeze through the systems
- Fill water strainers with antifreeze
- Fog cylinders in the engines
- Scrape biologicals from stern drive
- Check for wear (especially rubber boots)
- Outboard engines, flush, wash and drain
- Put fuel stabilizer in the fuel tank
Bilge
- Drain, clean, dry, and add small amount of antifreeze to bilge
Fresh Water Systems
- Drain, flush, clean, flush, then put antifreeze in them.
Head
- Take to a pump out station, flush with soap and water, disinfects, then put antifreeze through it.
Interior
- Clean it.
- Pack it.
- Leave every door, drawer, and storage locker OPEN.
- Shut down refrigerator/freezer
- Drain all lines
Exterior
- Inspect the hull, make repairs as needed.
- Pressure wash, if possible, then let dry.
- Apply paste wax.
- Get the boat under cover, under wraps, or stored out of the weather.
One thought on “The Smart Boaters Guide to Winterizing”
I want to make sure that my boat is stored safely during the winter. It makes sense that having an engine flush done would be a good idea! That way, I don’t have to worry about any gunk causing problems while my boat sits in storage.