Bottom painting (or repainting) is one hot debate among the boating set. Ask any dozen people about how to go about it, and you’ll invariably get just as many responses. This is because it depends on many factors. Time, money, know-how, the type of boat you own, the type of paint that was put on it before, the type of water you said, and your blood type. Okay, one of those wasn’t really true. Confusion, if you’ve owned a boat for any length of time, is just part of the life, and you must learn to embrace it with some style and grace.
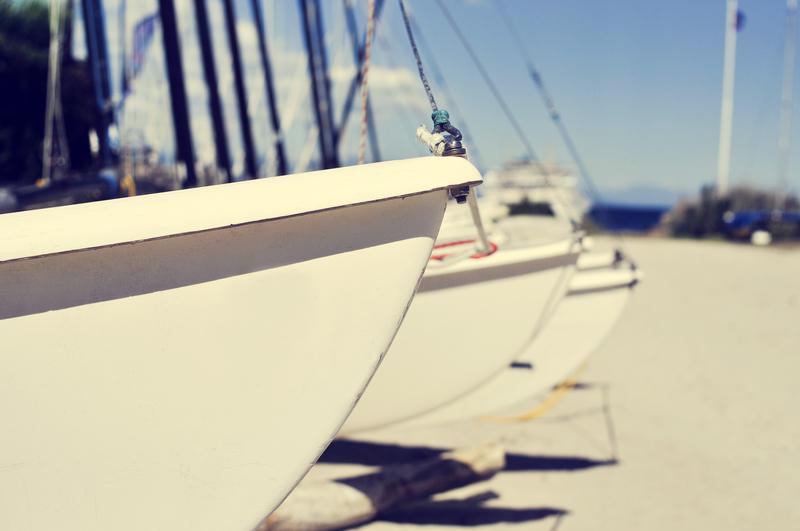
Take a Look at Your Bottom (your boat that is)
There are a few questions you need to ask yourself.
- What type of sailing do you do?
- What was the last type of paint applied?
- How much do you want to spend?
- Where are you typically berthed?
These questions will determine the types of bottom paint that you will use. Here’s a rough overview of the types of paint that are available for bottom painting.
There are two basic types of paint for your boat’s bottom: ablative and soluble (also sometimes called hard matrix). The differences are legion. There is a type of biocide in the soluble made out of copper that is designed to be leached out over time, but the paint layer, itself, stays pretty much intact. This will dry to a hard smooth surface, and it won’t wear off until you take it off.
The second type, ablative, is specifically made to wear off over time. The advantage, here, is that when each new layer wears off, a new layer of the biocide is released. If you sail a lot, or your boat is berthed in an area that has a long to strong currents, then this type of pain is going ow wear away quicker than a quiet harbor. It is easier to remove, of course, when you go to repaint the next season.
The soluble type of paints is cheaper than the ablative, and it does last longer. Some boatyard guys suggest doing a hybrid of the two, using a hard matrix as the first layer, then going over that with a semi-ablative in a different and contrasting color. That way, when the ablative wears away, you have an early warning system that will show you where the wear zones are and you can then judge how fast the semi-ablative is wearing away.
The biggest question, aside from the money in your wallet, is what type of paint was used on the hull before. It does matter. You can’t really put soluble paint over some softer left-over ablative..or you’ll have to make sure you’ve taken it all the way down to the epoxy level first. Don’t know what you had? Here’s a simple test. Take a wet cloth and rub really hard on a test spot. If the paint comes off, then it was ablative and you will have to keep cleaning until it is all gone, especially if you are going to switch types.
Why Paint the Bottom of the Boat at All?
If you like to go fast, then it’s all about lowering the resistance in the water. But if you’re like most daytrippers then it’s more about keeping the build-up of barnacles and algae to a minimum. This is called antifouling. West Marine has a great video on choosing the right paint for the job, too, but here’s a quick overview of the products that produce consistent results (plus it’s a one stop shop to get the rest of the materials you’re going to need).
Good Bottom Paint
T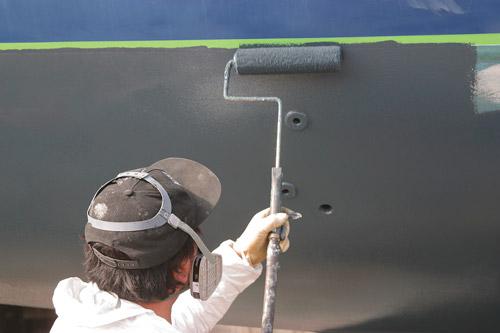 he price of the paint will be determined, in large part, on the amount of the copper that is in it. One that is very good for the recreational sailor is the CPP Antifouling Paint with CCT (composite copper technology). This ablative paint is easy to use, protects very well, comes in a wide variety of colors, and is very weather proof. The downside is
that it can be very messy and care has to be taken when applying it as it is not very forgiving of mistakes.
BottomShield Antifouling Paint is another great product that gives stellar results for those new to bottom painting because it is also more eco-friendly. The biocide is packaged around inert pellets that don’t leech into the surrounding marine environment. It does require two coats, and one gallon covers 400 SQ feet.
Better Bottom Paint
The Neptune 5 Hard Hybrid Thin Film Antifouling Paint is a very popular middle of the road choice for many because it offers the dual aspects of handling very tough marine environments without showing build-up and was specifically designed to be used over pre-existing hull paints. This is the soluble type of paint, that doesn’t need to be sanded between coats, and its low VOC. Very durable like a hard paint, this antifouling paint is one of the most used by beginners and veterans alike.
Best Bottom Paint
Ultima ECO Antifouling Paint made by Petit Paints is completely metal free but still uses a type of biocide with a lime fighting inhibitor for those that berth or sail in brackish waters. This offers multi-season protection, and can be used on nearly all substrates, including aluminum. This is an ablative that will wear away over time, letting you know when it is time to repaint.
Trinidad Antifouling Bottom Paint has been around for a long time for good reason: it works. This has the highest copper content of any of the antifouling paints out there. It has a hard epoxy base that offers a very nice fishing for both powerboats and sailboats. This is very good if you leave your boat berthed year ‘round, or if you live in a tropical locale.
You will also have to consider, along with the paint selection, the timing of the paint job. Different paints require different drying times between coats. For example, the BottomShield takes up to six hours to dry between coats and has to cure for another 60 days. That could put a damper on your boating plans. Also take the time to adequately stir the paint before using, especially those paints that are heavy with the copper additives as these tend to settle.
The Process: Paint Your Bottom Right
After you’ve chosen your paint, you will need to gather other materials that you are going to need:
- Orbital Sander with dust trap
- Velcro sanding pads (several different grits 3M 80 grit sanding discs )
- Sandpaper, varying grits
- Shop-Vac for dust control
- Rollers
- Disposable brushes
- Roller trays/mixing sticks
- Painter’s tape
- Full body armor in the way of disposable coveralls, gloves, respirator, eye protection and a life insurance policy. One of those was just a joke.
- Paint thinner and Dewaxer
- Rags
- Extension cords
- Long garden hose
- Sandable epoxy filler
- Scraper
Pre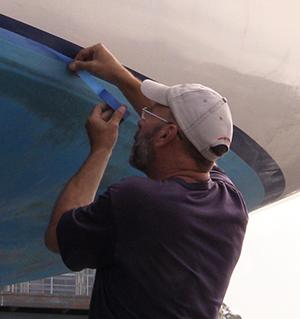 p Your Bottom
You’ll really need to look the surface over. If it doesn’t feel extremely smooth to your bare hands, then it isn’t ready yet. Fill in any of the dings, dents, or pits with the sandable epoxy filler. Let this cure, then sand it down until it is flush with the rest. If everything feels good to the touch, then give it a very good clean to remove any lasting contamination or dust particles. The Pettit 120 Brushing Thinner is great for this. With any type of sanding make sure that you are wearing your respirator and protective gear. Inhaling the paint particles is particularly bad for you and are known to be carcinogenic.
To Scrape Or Not To Scrape Your Bottom (your boat, that is)
Ideally, you do want to take off as much of the old paint as you can, but the end goal, of course, is to have a smooth bottom so it slides through the water nicely. Inspect your bottom and see if there are pits or nicks, or any rough spots. Those have got to be taken care of. Number one rule of thumb…memorize it or you’ll be sorry….when you see white…stop. That’s the epoxy layer or the gel coat, and it’s bad to go below that. But, honestly, getting down to the epoxy layer is not necessary. It’s all about smooth. Get everything as smooth as possible. Then remove the dust. If you have a lot of peeling, cracked paint, then you’re going to have to do some scraping, then use the orbital sander to get it smooth. Start with the roughest grit of paper, then work to the finer grit to make it really nice and smooth.
Once this is completed, you are going to need to get every particle of dust up that you can. If you have a shop-vac this can attach right to the orbital sander and suck it up as you work. This will make the job easier, but at any rate, you are going to also go over the entire hull with the thinner to remove all of the dust that might have been floating around and has decided after the fact to settle back on the surface.
Bring on the Boat Paint
T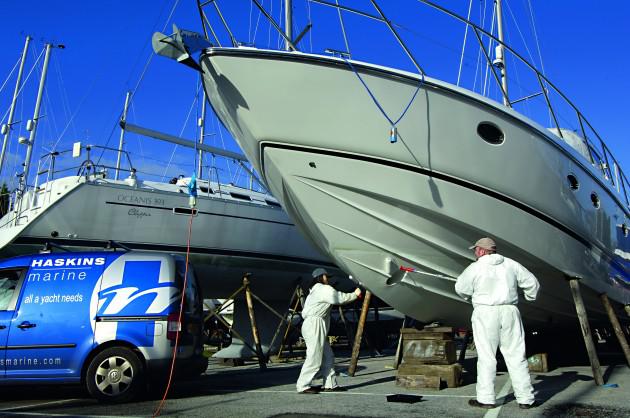 ake the painter’s tape and use it to protect anything you don’t want to get paint on. This could include the boot stripe, propeller, rudder (or remove it), transducers, etc.. The biggest thing you are trying to avoid, other than paint where you don’t want it, is to keep this particular kind of paint off of metal as it can cause corrosion.
Make sure that you paint when the temp is between 50-85 degrees Fahrenheit (10-30° C), because the high humidity will affect the drying time between coats. Direct sunlight and high winds are also bad conditions as the surface has to be dry and free of all sorts of contaminants.
Apply paint with the rollers and the way that the back of the paint can instructs. Each is a little bit different for a reason…follow those directions. Put the paint on in a nice even layer, resisting the urge to put it on too thinly, or piling it on to save time. For best results, most paint states that you need to use at least two coats, and for those that have the copper in them, then three coats are best.
After the painting is finished, you’ll need to let the entire thing cure for at least a few days, but don’t wait any later than 60 days after painting. The paint activates when it is in the water.
Where to Paint the Boat
Most Do it Yourselfers will do well to either paint in a boatyard where there’s never a lack of helpful input on the task at hand, or to do it at home under closely supervised surroundings. In other words, if you do this at home in the driveway, make sure that it is fairly well shaded, away from trees that might drop leaves or pollen, and that all children and animals are kept well away from the area. This also means that you’ll most likely have the boat up on the trailer. You can put the paint on while it is on the trailer, allowing it to completely dry first, then rolling it up in the trailer so that you can get to the areas you missed.
If you are in a boatyard and it is up on stocks, then you can have someone in the boatyard (you’ll pay them to do this) lift your boat and move it in the stocks so you can finish painting. Well worth the price. Others will tell you that they just wait until they are in the water to touch up those exposed areas, but dangling over the side to do this does not sound efficient or safe to do. You can also buy your own hull stands that have a jack. Sometimes you can just rent these as well. Do not think you will save money by using car jacks…they are not the same and the entire thing could come down on you.
To put the stands on using the jack, you’ll just raise the front of the trailer as far as you can, then you can take cinder blocks to put under the keel. Put wood between the blocks and the hull, then you can let the front end of the trailer down. You can also just slide the boat back and forth on the rollers to reach whatever areas you need to cover.
Regardless of where you are tackling the job, you’ll need to make sure that you have enough tarps or drop cloths over the area to protect it from the copious amounts of paint (both old and new) that are going to hit the ground. It is a fact. It will happen, and it will still manage to get on you even though you are wearing a full coverall with gloves. Most municipalities have strict rules about disposing of old paint or paint products, so make sure that you know what those are.
If you are working in a boatyard, make sure that you aren’t too close to someone else’s space otherwise you may not make friends when they find your Maritime Red competing with their Prussian Blue hull colors. Not a great way to stay in the good graces of your dock mates.
Painting Your Hull Takes Time
Go into this project with your eyes wide open and it can be done without too much trouble. The biggest problem that people face is impatience and thinking that it is a one day job. It is pushing it to get it done over one long weekend. Once you start, then you’ll want to make sure you finish at least that coat. Stopping in the middle can give mixed results and coverage. Just like most things with boating, if you’re going to do it, do it right.
Bring a Friend to the Party
Can one person do this job? Sure, and many do. They are called professionals. The rest of us have friends. You’ll know who they are because they don’t find excuses when you ask them to do the hard things. And they work for beer or wine. Or both. Either way, the job goes much faster when you have at least another pair of hands helping to apply the paint, or prep the surfaces. Painting the bottom of the boat can be a fun job when it is viewed in its proper perspective, and you do get faster and better at it with each season. It is one of those mechanical jobs that you can actually do for yourself that doesn’t require a great deal of skill or know-how, just a lot of grit (literally and figuratively). Taking the time to plan it out, read up on it, gather the materials, and bribe the appropriate friends to come help, all come together when you launch your freshly painted boat for the first time.